From Napkin Sketch to Tangible Object
Have you ever doodled a unique phone holder or a custom part on a napkin and wished it could become real? Computer-Aided Design (CAD) is the bridge that turns those digital ideas into physical things. While it can seem intimidating, the path to acing CAD is no longer reserved for those with years of technical training.
1. Choosing Your Entry Point (Without the Price Tag)
The "best" software is the one that works for your specific needs, and for beginners, free tools are the ideal starting point.
-
The "Lego" Approach (Tinkercad): Often cited by the community as the easiest place to start, Tinkercad allows you to create by dragging and merging simple geometric shapes. Most users can create their first useful model in under 30 minutes.

-
The Architectural Choice (SketchUp Free): If you are interested in straight-line designs like furniture or houses, SketchUp’s "push-pull" tools allow you to drag 2D shapes into 3D space instantly.

-
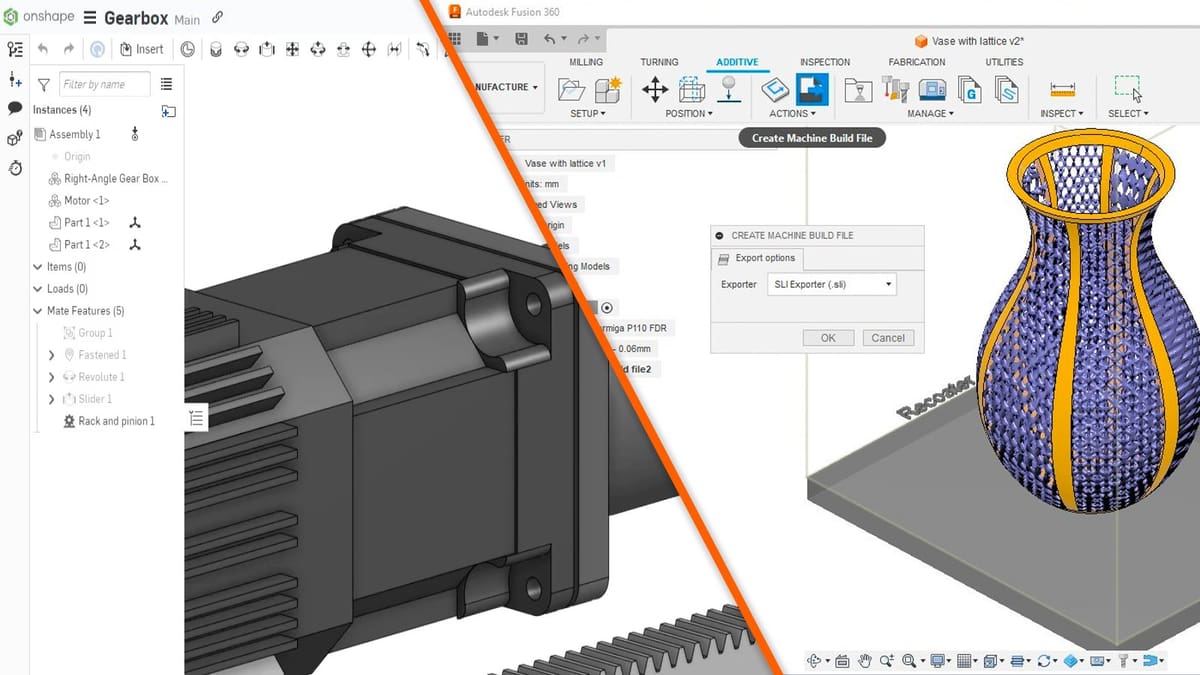
The Professional Path (Onshape & Fusion 360): For those seeking more power, Onshape is a cloud-native platform that runs in your browser, while Fusion 360 offers a modern toolset for "serious" 3D design.
2. The AI Shortcut: Sketch to 3D
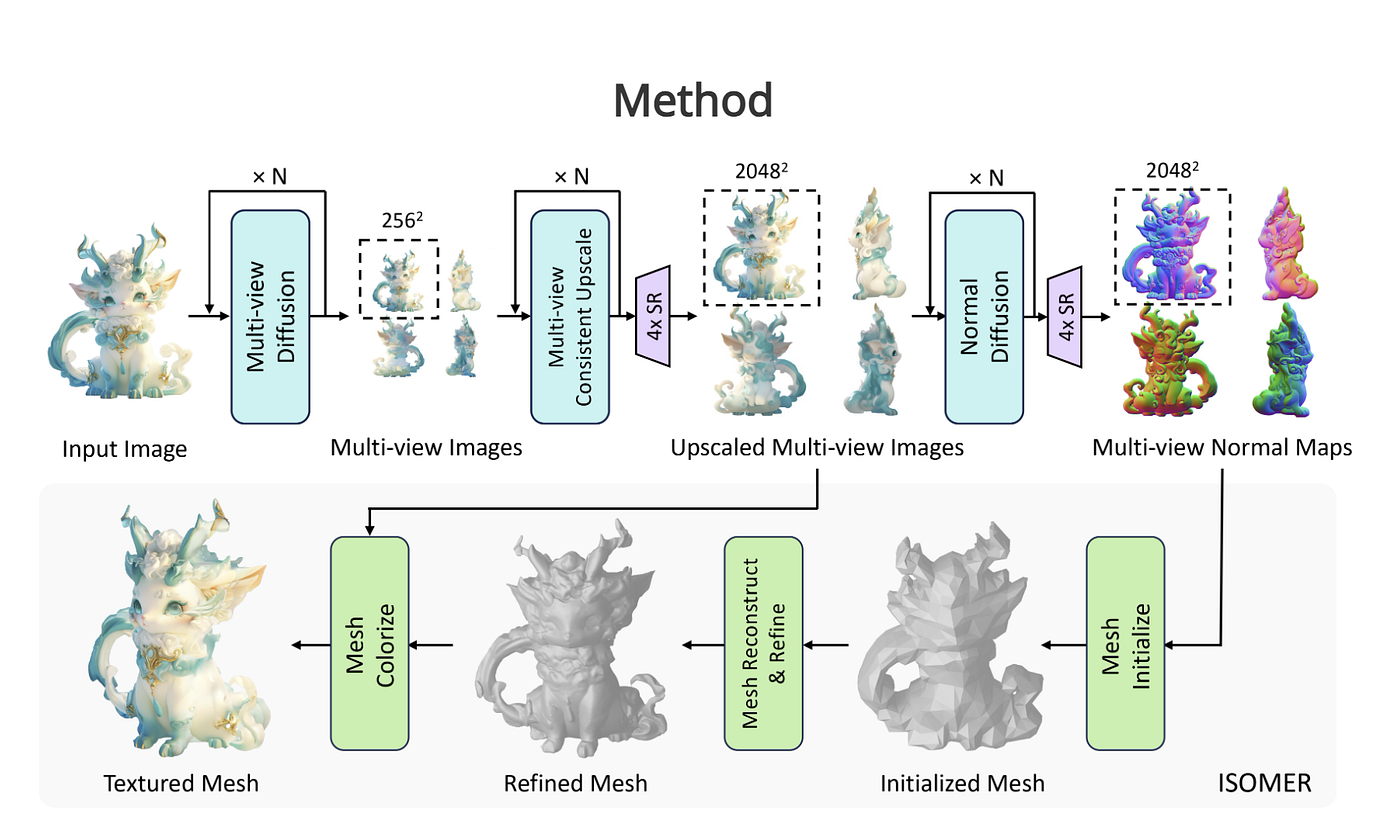
If traditional modeling feels like "climbing Mount Everest in flip-flops," new AI technology offers a revolutionary shortcut. Tools like Meshy.ai or Light Loop allow you to upload a simple 2D sketch on blank white paper and transform it into a 3D-printable model in minutes. This allows beginners to skip the steep learning curve of vertices and meshes and jump straight to the "joy of creating".
3. Mastering the Core Concepts: Design Intent & Constraints
To move beyond basic shapes, you must understand how engineers think. This is called Design Intent—the practice of defining your project’s requirements before you start.
- Geometric Constraints: These are "rules" for your shapes, such as making two lines parallel, perpendicular, or tangent (connecting smoothly).
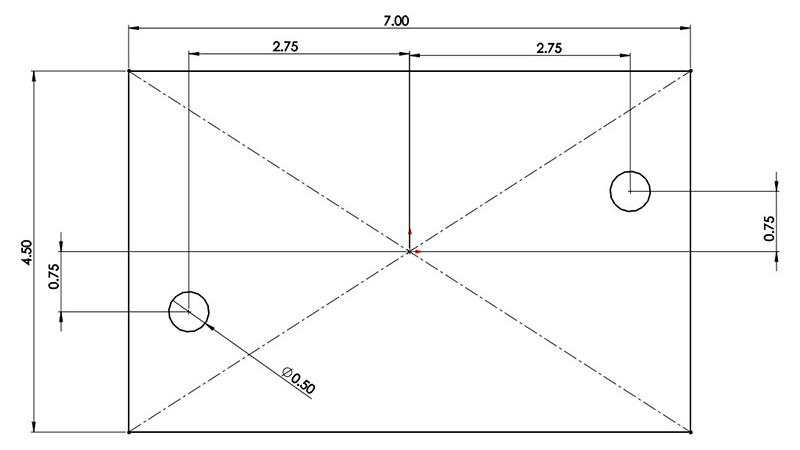
- Dimensional Constraints: These control the exact size and position, such as the length, radius, or angle of a part.
- The Goal: Aim for a fully constrained sketch, where every dimension is defined. This ensures your model is stable and won't behave unpredictably when you make changes later.
4. Avoiding Common Beginner Pitfalls
Even with the best tools, avoid these traps that frequently hinder progress:
- Neglecting the Fundamentals: Don't rush into complex projects. Master basic commands and the interface first.
- Ignoring Keyboard Shortcuts: Relying only on a mouse will slow you down. Master shortcuts like Copy (Ctrl+C) and Undo (Ctrl+Z) to significantly increase your productivity.
- Working Without a Plan: Sketch your designs and outline your workflow before opening the software to avoid aimless iterations and frustration.
- Forgetting Backups: Establish a routine of saving frequently and using cloud storage to prevent losing hours of work to technical errors.
5. Final Step: The Reality Check
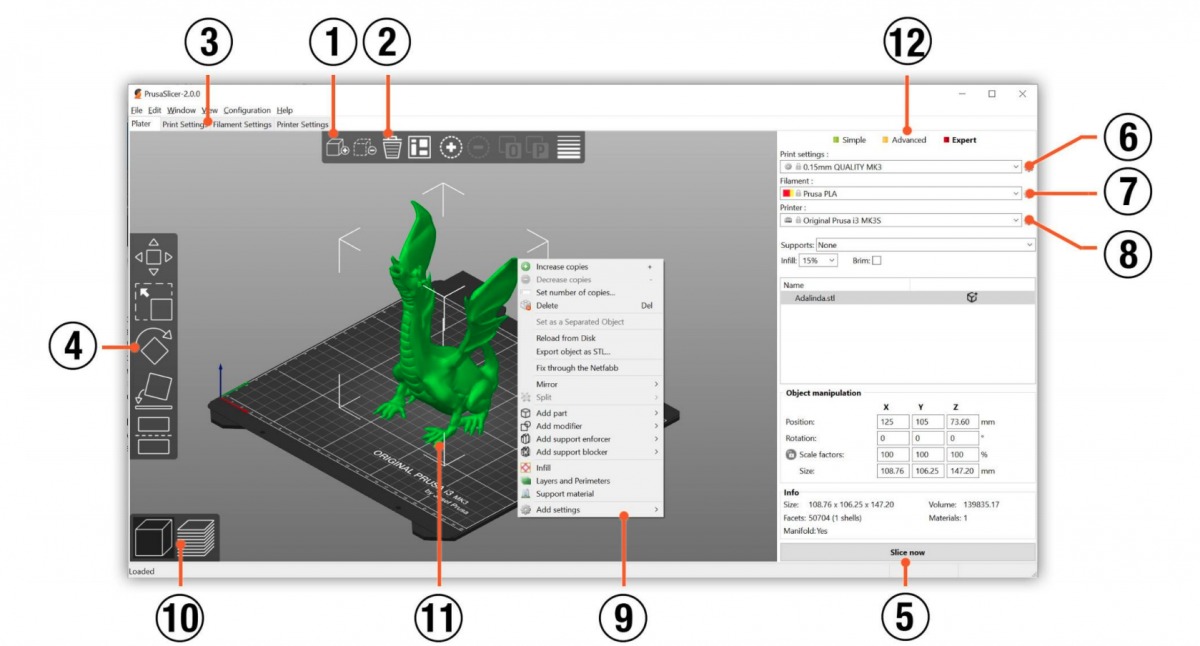
Once your design is finished, you must use Slicer Software to prepare it for 3D printing. Tools like Cura or PrusaSlicer cut your model into thin layers and create instructions the printer can follow.
Ready to turn your vision into a professional design?
If you need expert assistance moving from a concept to a high-precision reality, we can help.
VISIT RESERVED DESIGNS CAD SERVICES →